Publish and test an experience
Confirm draft changes, live booth behavior, and recipient delivery before launch.
Getting Started
Written forLaunch ownersAn experience moves through three stages: edit and save drafts, request launch (Snapbar makes the booth live), then publish any later changes to the live booth. Before launch, check your work with the in-editor draft preview; after launch, run a complete test submission using the same device type guests will use.
Steps
Before launch
- 1Open the experience and review the header state. A new experience starts in Draft with a Request Launch action; Snapbar confirms next steps before the booth goes live.
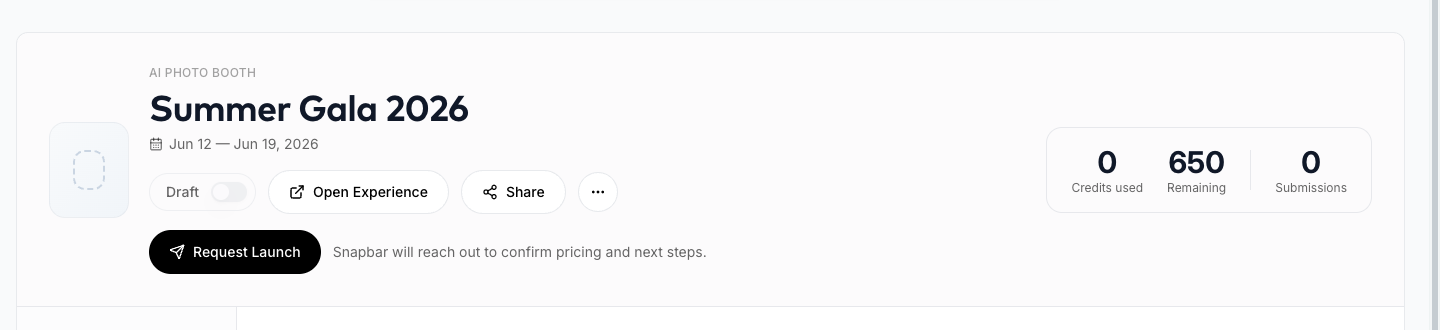
A draft experience header. Use Request Launch when setup is ready, and Snapbar will confirm next steps. - 2Use the live previews in Microsite, Delivery, and Sharing while editing.
- 3Publish changes when setup is ready.
After the booth is live
- 1Open the booth link from the Share dialog and complete one test submission.
- 2Run the complete checklist in Test the full guest flow before sharing links with guests.
What to know
- Before launch, guests see an Under Construction page.Until Snapbar completes the launch, the public booth link shows guests an Under Construction page, so use the editor draft preview to check your setup before launch.
- The live booth uses the last published configuration.Once live, the booth keeps serving its last published configuration until you publish again. If a test does not match the editor, check for unpublished changes first.
- Test on the real event device.Use the actual event camera, tablet, kiosk, or phone whenever possible. Camera permissions and browser behavior vary by device.
Tips
- Create one test submission after every major edit to booth copy, lead capture, delivery, or sharing.
- Keep the test output visible in Submissions so event staff can compare expected behavior quickly.
Related articles
Still need help?
Tell us the experience name and what you were trying to do, and our team will pick it up from there.