Design and Customization
Artwork sizes, formats, and upload locations
Choose what you are designing, check its size and format, then find where to upload it.
On this page
Find your artwork below. Sizes are width x height in pixels; all images have a 10 MB file limit.
File sizes and templates
File limit: 10 MB per image.
Sizes: use the recommended canvas. “At least” marks a minimum.
Templates: ask your Snapbar contact. Include your experience, style, and artwork type.
Booth page: logo and background
Branding for the booth page guests open before taking a photo.
Logo: transparent PNG or WebP, at least 400 px wide. Trim empty space. Upload: Microsite > General > Logo.
Trim empty space so the logo displays at the intended size. Extra transparent space makes the visible logo look smaller. Background: recommended 1920 x 1080 px, JPG, PNG, or WebP. Other shapes need a longest side of at least 1920 px. Keep text and logos out of cropped edges. Upload: Microsite > General > Background.
Use clean background artwork that can sit behind booth text and buttons. Text and logos in the background image may be cropped on a phone. Solid background: choose Color instead of uploading an image.
Style previews: images and videos
Upload: Experience > style card > Add preview for AI Photo Booth, AI Video, and Event Headshots.
Image: recommended 1080 x 1350 px, JPG, PNG, or WebP. Keep the subject centered for the 4:5 crop.
AI Video preview: short MP4, MOV, or WebM, up to 10 MB. Center the subject; the clip should work silently on repeat.
AI photo overlays
A transparent frame or logo placed over the finished photo.
Upload: AI Photo Booth, AI Video, and Event Headshots: Experience > Add overlay on the style card. AI Stories, Persona Quiz, and Trading Cards: Microsite > Overlays, which lists each style’s exact size.
Overlays should frame the output without covering faces, bodies, or the main generated subject. Canvas size: 1792 x 2400 px (width x height) for the standard 3:4 output. The style card’s button names your style’s ratio, such as Add 3:4 overlay. If it shows another ratio, or just Add overlay, ask your Snapbar contact for the canvas size before designing.
File: transparent PNG or WebP per style. Keep faces and the guest area clear.
Custom text or logos: Snapbar configures separately positioned elements and text from guest answers.
AI Video clips: ask Snapbar for a separate video overlay. Photo overlays do not brand the clip.
Video Testimonials: upload recording overlays in Microsite > Overlays once styles are configured. Use the recording size shown by that upload field.
Event Headshots: example photos on the Tips page
Upload: Microsite > Tips. Keep the supplied photos or replace the good example and the example to avoid.
Files: two JPG, PNG, or WebP photos, at least 480 px wide. Center faces for the 4:5 crop. Use photos you have permission to share.
Digital Photo Booth artwork
For camera or upload-based Digital Photo Booth experiences.
Upload: Experience for photo backgrounds, frames, and stickers.
Sponsor graphic: JPG, PNG, or WebP, at least 1400 px wide. Upload: Microsite > Sponsor. It displays without cropping.
Names: give each file a recognizable name, up to 100 characters.
Photo backgrounds
Upload: Experience > Backgrounds. Upload up to 15 JPG, PNG, or WebP files.
Size: recommended 1638 x 2048 px for 4:5; other shapes are listed below. Minimum width: 1080 px. Turn on background removal to place it behind guests.
Photo frames
Upload: Experience > Frames. Upload up to 15 transparent PNG or WebP files.
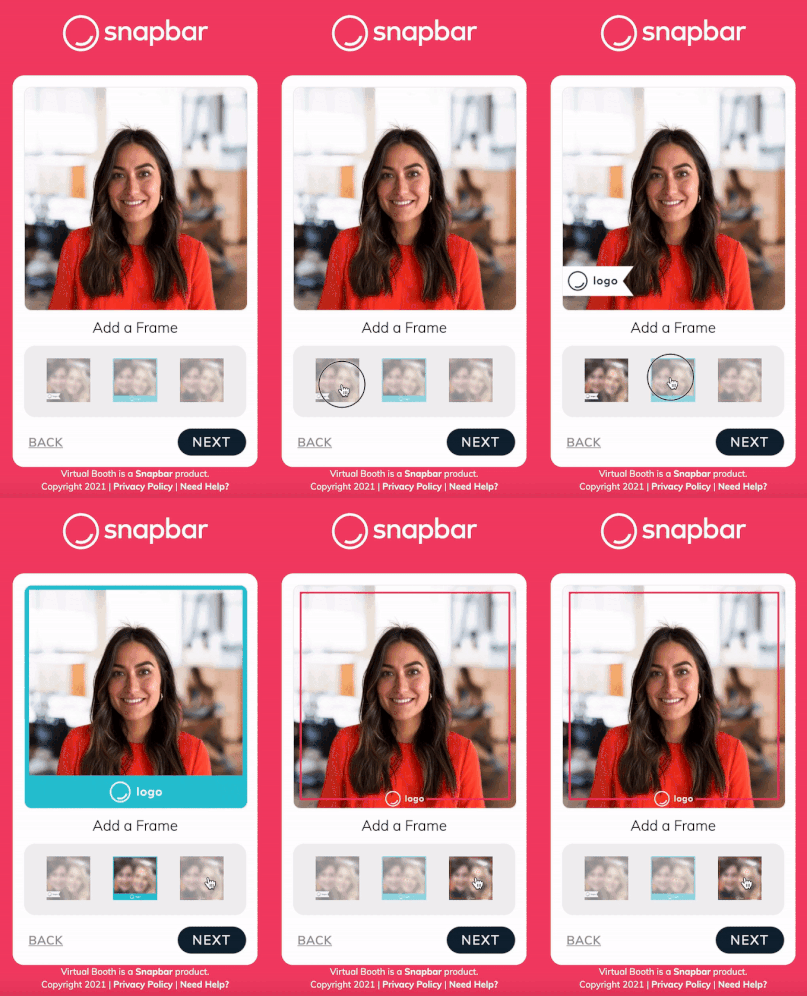
Frames sit above the guest photo and selected background. Build them on the same canvas size as the final output. Size: recommended 1638 x 2048 px for 4:5; other shapes are listed below. Minimum width: 1080 px. Match the photo shape and leave the guest area transparent.
Stickers
Upload: Experience > Stickers. Upload up to 50 transparent PNG or WebP files.
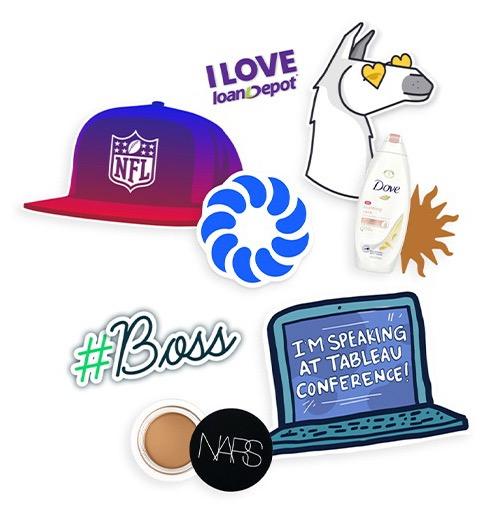
Stickers read better when they have contrast, a clean silhouette, or a subtle border. Size: recommended 1024 x 1024 px. Trim empty space; add a contrasting border if needed. Guests can move and resize stickers.
Digital Photo Booth canvas sizes
9:16 vertical: 1152 x 2048 px.
4:5 portrait (default): 1638 x 2048 px.
3:4 portrait: 1536 x 2048 px.
1:1 square: 2048 x 2048 px.
16:9 landscape: 2048 x 1152 px.
1.91:1 wide: 2048 x 1072 px.
For Digital Photo Booth backgrounds and frames only. Confirm your style’s photo shape before designing.
Live Mosaic artwork
Upload: Displays > your Live Mosaic > Edit. Snapbar adds the display for your event.
Main image: JPG, PNG, or WebP. Recommended: 3840 px on the longest side, matching the wall’s shape. Choose a bold logo or simple image for the tiles to form.
Corner logo: transparent PNG or WebP, at least 400 px wide.
See Mosaic specs and best practices for canvas sizes and setup.
Delivery email branding
Upload: Delivery. Turn off Inherit from Experience to use separate email artwork.
Logo: transparent PNG or WebP, at least 400 px wide.
Background: JPG, PNG, or WebP, at least 1200 px wide. Keep it subtle so text stays readable.
Save and select Send Test. See Configure delivery and sharing for the full setup.
Guest result page: logo and background
Upload: Sharing. Turn off Inherit from Experience to brand the page where guests view and download their result.
Logo: transparent PNG or WebP, at least 400 px wide.
Background: JPG, PNG, or WebP, at least 1920 px on the longest side. Edges crop to fit the screen; keep important content central.
Finished photo files and QR signs
Photo files: Digital Photo Booth saves JPGs. Check a downloaded AI result’s format and dimensions before printing.
QR code: download from the experience’s Share menu. Leave clear space around it and test scanning the printed sign.
Leave clear space around the QR code and test it at the intended scanning distance. See Share your booth link and create QR signage for sign setup.
Tips
- If an upload field disagrees with this guide, send your Snapbar contact a screenshot before redesigning your artwork.
- Check page artwork on phone and desktop. Save, publish, and run a test submission to check photo artwork.