Event Day Operations
Plan your own onsite printing
Run your own print station alongside the booth. Snapbar experiences are digital-first and do not include printing services.
On this page
Your team supplies and runs the print station; Snapbar does not provide printers or printing staff. Enable a gallery’s Print button to print photos from a separate staff device.
Plan your print station
Decide whether guests need physical prints in addition to their digital delivery.
Source your own printer, paper, and a dedicated print device. Never print from the device guests are using for the microsite.
Plan the workflow: a staff member watches incoming results and prints them from the print station.
Choose the print size
With Show Print Button on, a Print Size select appears under the toggle. Fit to paper is the original behavior: the photo scales to whatever paper the print dialog has selected.
Pick 4 x 6 in (300 DPI) for compact event photo printers. The sheet is set to 4 x 6 inches, the photo is sent at up to 300 DPI (a result smaller than 1200 x 1800 pixels prints at its own resolution), and the sheet turns to match the photo, so landscape photos print landscape. Select the 4 x 6 paper in the print dialog.
On a Trading Cards experience with the 4 x 6 size selected, turn on Print Front and Back Together to print each card as one landscape 4 x 6 sheet: the front on the left and the personalized back on the right, each in a 3 x 4 inch slot. Cards designed at a 3:4 ratio fill the sheet edge to edge, and a style with no card back prints the front alone.
Save the display. The size applies to that display only, so a staff print station can use 4 x 6 while a public gallery keeps Fit to paper.
Print from a laptop or Windows tablet
Connect the printer to your device with a USB-C cable. The cable is not included with the printer.
Open the downloaded image and select Print.
Select the Liene Photo Printer and make sure the 4 x 6 inch size is selected.
Print from a smartphone
Connect to the printer Wi-Fi network, named Liene Photo Printer. The default connection password is 12345678.
Join the printer network from your phone Wi-Fi settings. Optional: under Settings, Cellular, turn on Wi-Fi Assist so the phone keeps internet access over 5G while connected to the printer.
Wi-Fi Assist keeps internet working over 5G while you are connected to the printer. Save the result to your camera roll. The easiest way is to press and hold the image in the email and select Save to Photos.
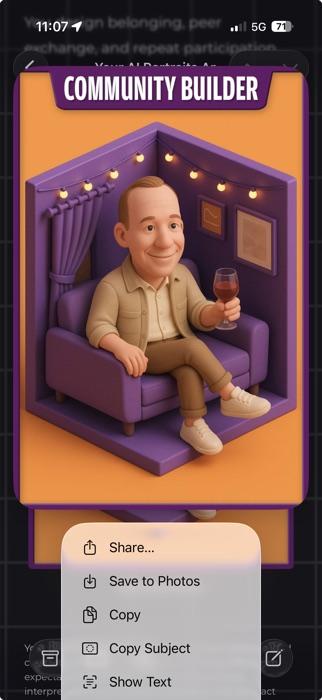
Press and hold the photo in the email, then choose Save to Photos. In Photos, tap the share button, select Print, then choose the printer and the 4 x 6 paper size.
Share, then Print: pick the Liene printer and the 4 x 6 inch paper size.
Run it on event day
Run a print test with a real generated output using the actual event printer, paper, and network.
Assign a staff member to own the print station for the whole event.
Keep a fallback plan, such as pointing guests to their emailed result, in case the printer stops.
What to know
- Printing adds operational risk because it depends on hardware outside the platform. Build extra test time into the event schedule, and bring spare paper, ink or media, power strips, and cables.
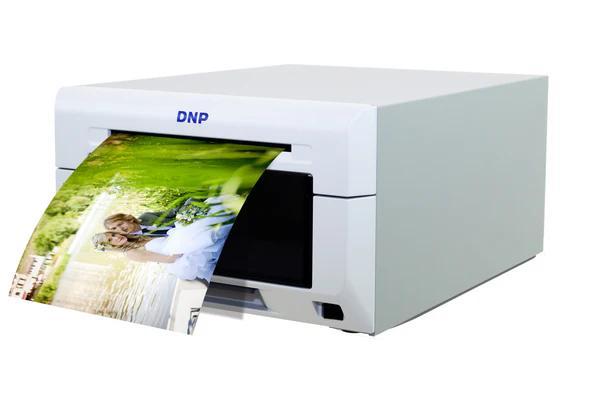
- The connection steps above are for the Liene printers. On an older Windows computer you may need the driver from liene-life.com/pages/driver before the printer shows up in the print menu. The DNP DS620A uses its own drivers.
- The smartphone screenshots were taken on an iPhone, but the same process works on most phones.
- Compact dye-sublimation printers are the event standard. The Liene Amber line (M100, or M200 with a built-in battery) is simple and budget-friendly and uses its own auto-laminated 4x6 paper. The DNP DS620A is the premium pick, printing a 4x6 in about 8 seconds with professional quality. The helpful links above are recommendations, not requirements, and listings may change.
Tips
- Dye-sublimation photo printers are the usual choice for event prints. Test yours with the final output style, not a placeholder image.
- High-volume events should plan a second printer or a managed print vendor.